 Ransomware

Many people think of a home network-attached storage (NAS) device as a large hard drive connected to their router. They store videos, photos, documents, and backups on it, then barely think about the device for years. That’s a huge mistake.
In October 2026, attackers began infecting Synology NAS devices with C3RB3R (Cerber) ransomware. Many users report that they can no longer open files on their network storage, and that text files containing ransom demands are appearing in their folders. And this isn’t happening because someone accidentally downloaded a malicious file: anyone who forgot to update their network storage in time is at risk.
In this article, we explain exactly who’s at risk and how to protect your data.
Who C3RB3R targets and how the attack works
We’re used to thinking that malware gets onto a device after someone downloads a suspicious file or follows an attacker’s instructions. But the vast majority of C3RB3R infections happen without any user interaction at all — the attacker only needs to reach a vulnerable NAS service. Specialized scanners likely help find such devices by automatically looking for Synology NAS systems and checking their DiskStation Manager (DSM) version.
In October, many Synology owners began reporting C3RB3R attacks. Synology officially confirmed the issue and said the attackers were exploiting a vulnerability that had been fixed back in December 2024. Based on the description, this appears to be CVE-2024-10441 — a vulnerability that lets an attacker execute arbitrary code in the NAS operating system without authentication.
At the same time, researchers at 360.cn reported that the C3RB3R attacks they examined also involved two other critical vulnerabilities, each rated 9.8: CVE-2026-13639 and CVE-2026-13684. These vulnerabilities allow arbitrary file reads or writes and denial-of-service (DoS) attacks. Synology hasn’t confirmed that these vulnerabilities have been used in this campaign. The company patched them in its September DSM update.
Either way, the vulnerabilities mentioned above allow attackers to target a NAS remotely. For attackers to access your storage, get ransomware onto it, and run it, only two conditions need to be met:
- You haven’t updated your network-attached storage for a long time
- The Synology DiskStation Manager (DSM) interface is accessible from the internet (or the local network)
That’s it. The attacker doesn’t need your password or any action from you. Every Synology NAS owner who hasn’t updated the system in time is at risk.
If you haven’t installed updates yourself recently and don’t remember whether automatic updates are enabled, we recommend first blocking internet access to your NAS and then updating the device manually as soon as possible — otherwise, you could easily end up among the victims.
Keep in mind that until the updates are installed, the device remains vulnerable to attacks from the local network. So, if your Synology NAS is accessible to other users on the LAN — for example, it’s shared with neighbors or connected to a university, office, or dorm network — the safest option is to disconnect the Ethernet cable and turn off Wi-Fi if your NAS model supports it. Then download the update files to your computer, disconnect the computer from both the wired network and Wi-Fi, connect the NAS directly to the computer with an Ethernet cable, and update its operating system and applications in a fully isolated environment.
Another strong reason to update your network storage is the recently discovered PHP vulnerabilities. Synology has already released urgent updates for its operating system and the Mail Station and Synology Calendar applications.
What happens to files after infection
Once C3RB3R ransomware gets onto network-attached storage, it starts traversing every accessible folder containing user data and encrypts the files inside — photos, documents, archives, videos, and audio recordings — adding the .L0CK3D extension to encrypted files. If a user tries to open one, the system reports that the file is corrupted or in an unknown format. Unfortunately, simply renaming the file won’t remove the encryption.
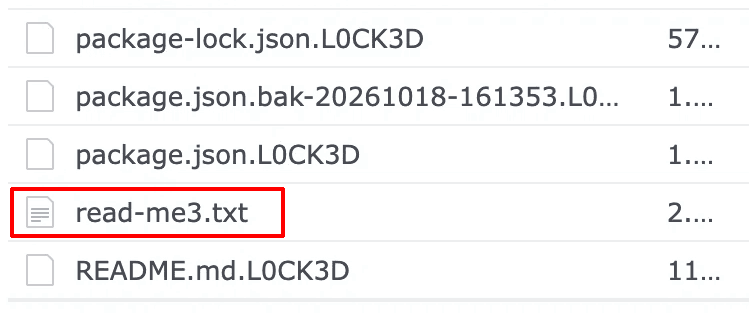
This is what files look like after C3RB3R encrypts them
The attackers also helpfully leave a text file named read-me3.txt in folders containing encrypted files, with instructions on how to decrypt the data on your storage. Apparently, all you need to do is… open the totally-not-suspicious Tor Browser and pay the attackers for a decryptor that supposedly restores all your files. Needless to say, there’s no guarantee you’ll get your files back intact.
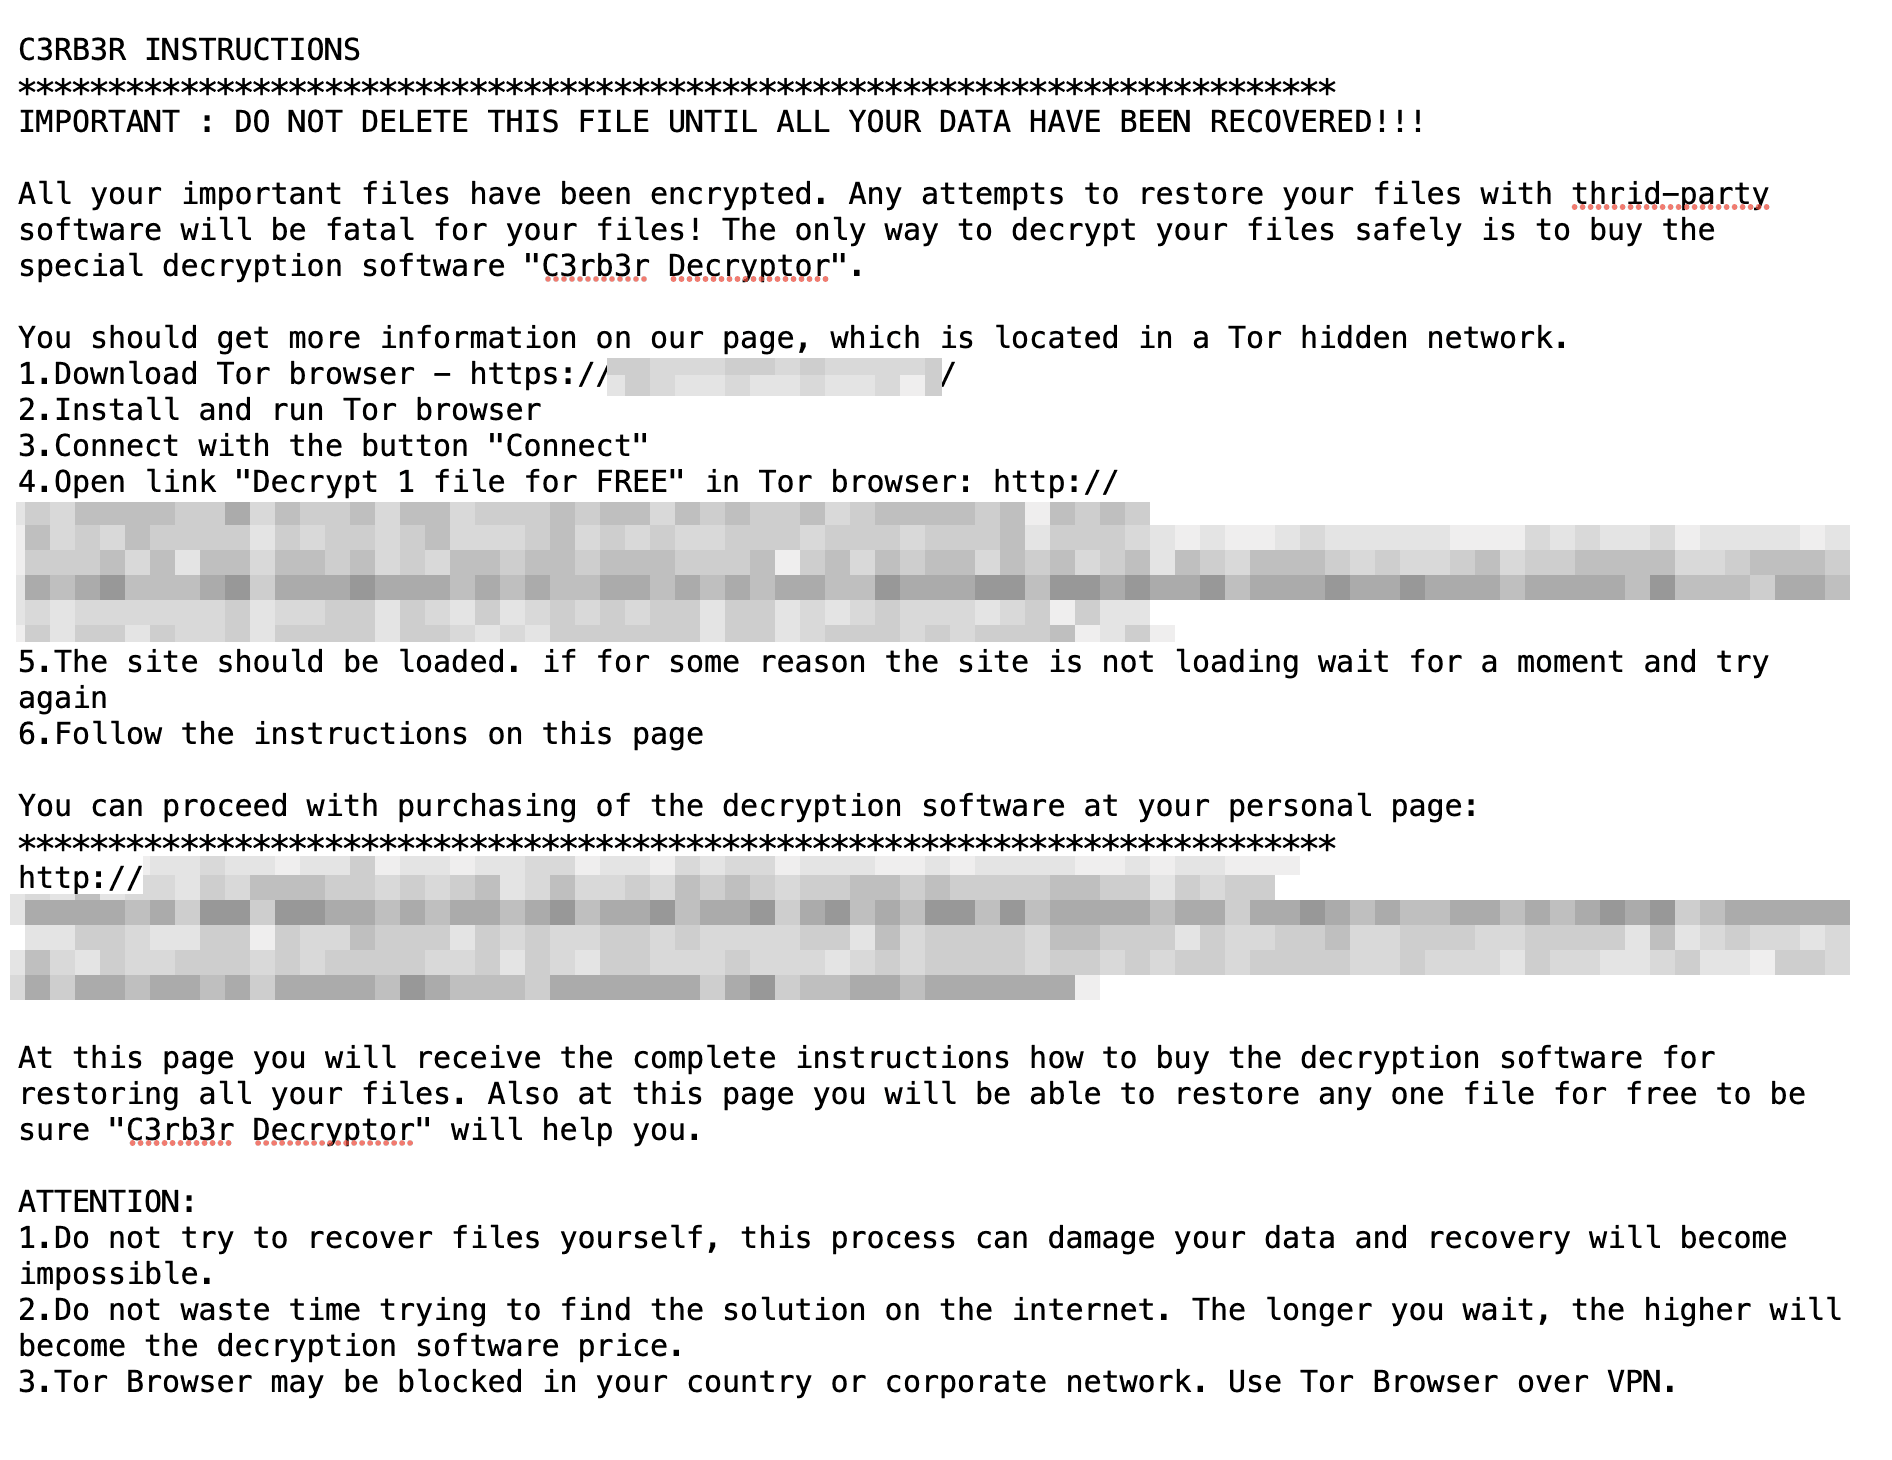
C3RB3R leaves a ransom note like this in every folder containing encrypted files. A truly generous offer: decrypt one file for free, then pay for the rest
Losing all or most of your files may not be the only unpleasant consequence. Attackers often blackmail victims by threatening to publish stolen data — account credentials, intimate photos, work documents, and other confidential information. If the victim refuses to pay the ransom, the criminals threaten to make all of this data public. They may contact you with these demands by email or through social media.
Often, such threats are nothing more than a scam, and we covered these schemes — and what to do if you’re being blackmailed — in detail in our post How scammers use email for blackmail and extortion. But if your NAS has actually been encrypted, unfortunately you can’t rule out data theft.
What to do if ransomware has already infected your Synology NAS
If ransomware has already attacked your NAS, you may face one of two situations.
- You caught the ransomware in the act and are watching in horror as more and more files are encrypted and renamed before your eyes.
- The user folders have already been encrypted, and the .L0CK3D extension has been added to all your files.
What should you do?
1. Immediately disconnect the NAS from all networks (but don’t power it off)
The NAS needs to be completely isolated from the internet and the rest of your home network. Disconnect every cable from the NAS except the power cable. If your NAS model connects to the local network over Wi-Fi, disable the wireless connection too. You can either disable it on the NAS itself (some Synology models have a Wi-Fi button that turns off wireless networking when held down) or simply unplug your router. This cuts off the attackers’ remote access to the device and prevents the infected NAS from reaching other computers and storage devices.
If external USB drives are connected to the NAS to expand its storage capacity, disconnect those too — there’s a chance the ransomware hasn’t reached them yet.
Pause synchronization and backup jobs associated with the NAS on computers and in cloud services. This helps prevent damaged files from spreading to other copies and overwriting versions that are still intact.
2. Decide whether to power off the NAS
If you catch Cerber in the act, your first instinct may be to pull the NAS power cable, but you shouldn’t do that: a sudden loss of power can corrupt data being written to disk. It’s better to use the NAS’s normal shutdown procedure, but keep in mind that doing so removes one possible way to recover files that have already been encrypted. A specialist may, with some luck, be able to extract a recovery key from the device’s RAM. Once power is removed, RAM is cleared.
- If you’re not a technical user, don’t know anyone who can help with recovery, and encryption is still in progress, shut the NAS down normally; if the device doesn’t respond, pull the power cable. That way, you’ll preserve at least the files that haven’t been encrypted yet.
- If you’re an advanced user, connect the NAS directly to an isolated computer with an Ethernet cable and try logging in to the NAS over SSH. Check the running processes (
sudo ps -ef), identify the ransomware process, determine its PID (process ID), and pause encryption without terminating the process (sudo kill -STOP PID, where PID is the ransomware process ID). Then verify that all process threads are stopped (statusT) and follow the C3RB3R / .L0CK3D ransomware rescue instructions for saving a memory dump. If you can’t stop the encryption, power off the NAS. - If the files on your NAS have already been encrypted and you’ve disconnected it from the local network, you can leave it powered on and try to preserve the contents of memory and recover the data by following the C3RB3R / .L0CK3D ransomware rescue instructions.
3. Save the encrypted files and the ransom note
If the ransomware has finished encrypting the files on your NAS and you’ve disconnected it from the internet, try connecting directly to the NAS and saving a copy of the encrypted files and the attackers’ instructions to an empty external hard drive. Security researchers may release a free C3RB3R decryptor in the future.
If you powered the NAS off while encryption was in progress, don’t turn it back on just to inspect processes or copy files — encryption happens locally and may resume after the device reboots. In this case, contact a reputable data-recovery specialist who can read the NAS drives without booting the infected DSM installation.
If, following the previous steps, you disconnected the NAS from the network, connected to it directly in an isolated environment, and stopped the ransomware processes, you can save any unencrypted files you need to rescue. It’s better to connect the backup drive to the computer that’s directly connected to the NAS rather than to the NAS USB port — this reduces the chance that the ransomware will restart and encrypt that drive too.
4. Don’t restore files or connect drives containing backups until the ransomware has been removed
Don’t connect an external drive containing a backup to the infected NAS, and don’t start restoring files from a backup onto the compromised NAS. The ransomware may run again and damage the connected drive.
5. Once the attack has been stopped, check your snapshots in Snapshot Replication
If you configured Snapshot Replication in advance and the attackers didn’t destroy the snapshots, you can recover data from them — but restoring it to the compromised NAS makes no sense. You’ll need a separate drive for the backup.
First, check whether the snapshots are still there. Once the malware has been stopped, open Snapshot Replication from DSM’s main menu on the running NAS. Select the shared folder, open Snapshot → Snapshot List, find a snapshot created before the infection, and click Browse to inspect its contents. From there, you can also copy data from the snapshot to external media without restoring it to the infected volume. For details on using Snapshot Replication, see Synology’s instructions.
6. Wipe the compromised NAS and reinstall DSM
After you’ve saved everything you can — including encrypted and unencrypted data as well as logs — reset the NAS to factory settings before using it again (Factory Reset → Erase All Data).
Keep in mind that this completely erases all data, applications, and settings on the network storage. Before resetting it, check the backups you’ve made and make sure the intact files you copied can be opened, the required file versions from snapshots have been saved, and the encrypted files, ransom notes, logs, and any memory dumps you obtained are stored on another storage device rather than on the NAS. If anything is missing, preserve the original drives or full disk images for a data-recovery specialist. If you can manage without the NAS for a while, don’t rush to wipe it: free decryption tools may appear later.
If you used the NAS as little more than a dumping ground for files and there’s nothing truly valuable on it that you can’t replace, fully wipe the storage as described above before using it again, and reinstall DSM from an official source using the instructions for installing DSM without an internet connection.
Don’t restore settings from a backup created after the infection: it may contain changes made by the attackers. It’s best to configure the NAS from scratch.
7. Check potentially compromised accounts
Reinstalling DSM doesn’t invalidate stolen passwords, sessions, or other secrets for services whose credentials may have been stored on your device. Think about which services were used on your NAS, which additional packages were installed, and what they could access. Go through all of those services, terminate suspicious sessions, revoke affected keys and tokens, change passwords, and enable two-factor authentication. We recommend storing all credentials in the secure vault of a password manager. Do this before reconnecting the storage to the network.
8. Before reconnecting the NAS to the network, disable unnecessary remote access
Disable QuickConnect
This service lets you connect to your NAS over the internet. To disable it in DSM 7, open Control Panel → External Access → QuickConnect, clear the Enable QuickConnect checkbox, and click Apply. In earlier versions, the QuickConnect section is located directly in Control Panel.
Check whether the NAS is exposed to the internet through your router
Your router may be configured to forward incoming connections from the internet directly to the NAS — this is called port forwarding. First, find the NAS’s local IP address. In DSM, you can see it under Control Panel → Network → Network Interface.
Next, open your home router’s settings. Usually, you do this by entering its local address in a browser; the exact address and login credentials are often printed on a label on the router or shown in your ISP’s app.
In the router settings, find a section named something like Port Forwarding, Forwarding, or Port Redirection. Review the existing rules. If a field such as Internal IP, Local IP, Destination, or Device contains your NAS’s IP address, delete that rule.
Also check the DMZ, DMZ Host, or Exposed Host section. If the NAS IP address is listed there, disable the feature.
Disable automatic port opening through UPnP
UPnP lets applications and devices ask the router to open ports for them automatically. If you don’t need UPnP, disable it.
Keep in mind that this is a router-wide setting, so disabling it may affect other devices on your home network. If you want to keep UPnP enabled for them, at least review the rules created through UPnP and make sure none of them point to the NAS IP address. If any do, delete them and, if your router allows it, block automatic port opening for the NAS.
Additional checks
If you use IPv6, review its rules too: unnecessary inbound connections to the NAS should be blocked. Also disable unused tunnels, VPNs, and other remote-access services if you configured any. After making these changes, check whether the NAS is reachable from an external network, for example over a mobile data connection.
9. Keep checking for a free decryptor
Cybersecurity researchers periodically release free decryptors for file recovery. Keep in mind that one may take a long time to appear, so don’t trust offers from unknown “researchers” or websites claiming they can instantly recover your data after an attack by a new ransomware strain.
What owners of DIY NAS systems should do
Many people use third-party loaders for DiskStation Manager — unofficial tools from the XPenology project that let them run Synology’s operating system on hardware it wasn’t originally designed for, such as a PC or a custom-built server. Examples include Arc, RR (RedPill Recovery), and M-Shell.
If you run DSM this way, C3RB3R can attack your system too. But don’t rush to update DSM: first make sure the new version is compatible with your loader and hardware. Otherwise, your files could be damaged.
If you can’t install the latest system version yet, restrict access to the network storage by disabling external access and allowing local-network connections only from devices that need access. If possible, put the NAS on a separate network segment. The Smart Home Monitor feature in Kaspersky Plus and Kaspersky Premium can provide additional protection for your home network — it shows all devices on your local network and detects when new, unfamiliar devices connect.
How to protect your NAS and personal data
- Don’t put off software updates for your NAS, and check that automatic updates are enabled.
- Don’t expose ports 139 and 445 to the internet: they’re frequent targets of automated attacks. These ports are used by the protocol that lets computers open shared folders on a NAS. It’s useful on a home network, but it shouldn’t be exposed to the entire internet. You can check whether these ports are open in your router settings.
- If you need to access your NAS remotely — while traveling or from work — it’s better to set up a remote connection to your home network first and then access the storage from inside that network than to expose the NAS directly to the internet.
- Don’t keep the only copy of important files on your NAS. Configure regular Snapshot Replication snapshots and make regular backups. Remember the 3-2-1 rule: keep three copies of your data, on two different storage media, with one copy kept off the primary storage on a disconnected hard drive.
- You can also entrust important documents to the Kaspersky Password Manager. It can store account credentials, text notes, scans of personal documents, photos, addresses, bank card details, and PDF documents in the encrypted vault, protected by a master password that only you know. The vault syncs across all your devices, so your data stays protected and accessible from both computers and smartphones.
- Use reliable protection that prevents ransomware and other malware from being downloaded to your computer.
- Protect the administrator account. Enable two-factor authentication, use a unique password, and set up automatic blocking after several failed sign-in attempts, or use passkeys. Store passwords, passkeys, and 2FA tokens in an encrypted password manager. These measures won’t protect you from the current C3RB3R attack — Cerber exploits vulnerabilities that don’t require authentication — but they’ll help if an attacker tries to compromise your account or finds your password in a data leak.
How should you store and protect your data? Read our articles:

 Tips