 tips
tips
Reports, articles, marketing materials — all are document types most of us handle at some point. We write and edit them on computers, e-mail them to colleagues or friends, share them in the cloud, hand them to clients, and so much more.
If a file you intend to show to others contains information they shouldn’t see, however, you could run into problems. Let’s figure out how to prevent that.
Capricious images
Secrets such as passwords in the background often show up in images, and by no means do all editing tools get rid of them properly. For example, even if you thoroughly blur over sensitive information with a semitransparent brush, simply tweaking the brightness and contrast is sometimes enough to reveal the secret. To find out how an image can inadvertently spill confidential information — and how to hide it — read this post.
In a nutshell, to really hide passwords, bar codes, names, and other secret data in images you work with in a graphics editor, you need to remember two things. First, perform any blurring with 100% opaque tools. Second, publish the image in a “flat” format such as JPG or PNG to prevent others from stripping it into separate layers.
But what if you see secret information in an image that’s embedded into a text document?
Mischievous PDFs
Let’s say you’re about to send a brochure to a client when you realize one of the images contains a colleague’s personal data. You draw a black rectangle over it, using the paid version of Adobe Acrobat on your office computer. All set, right?
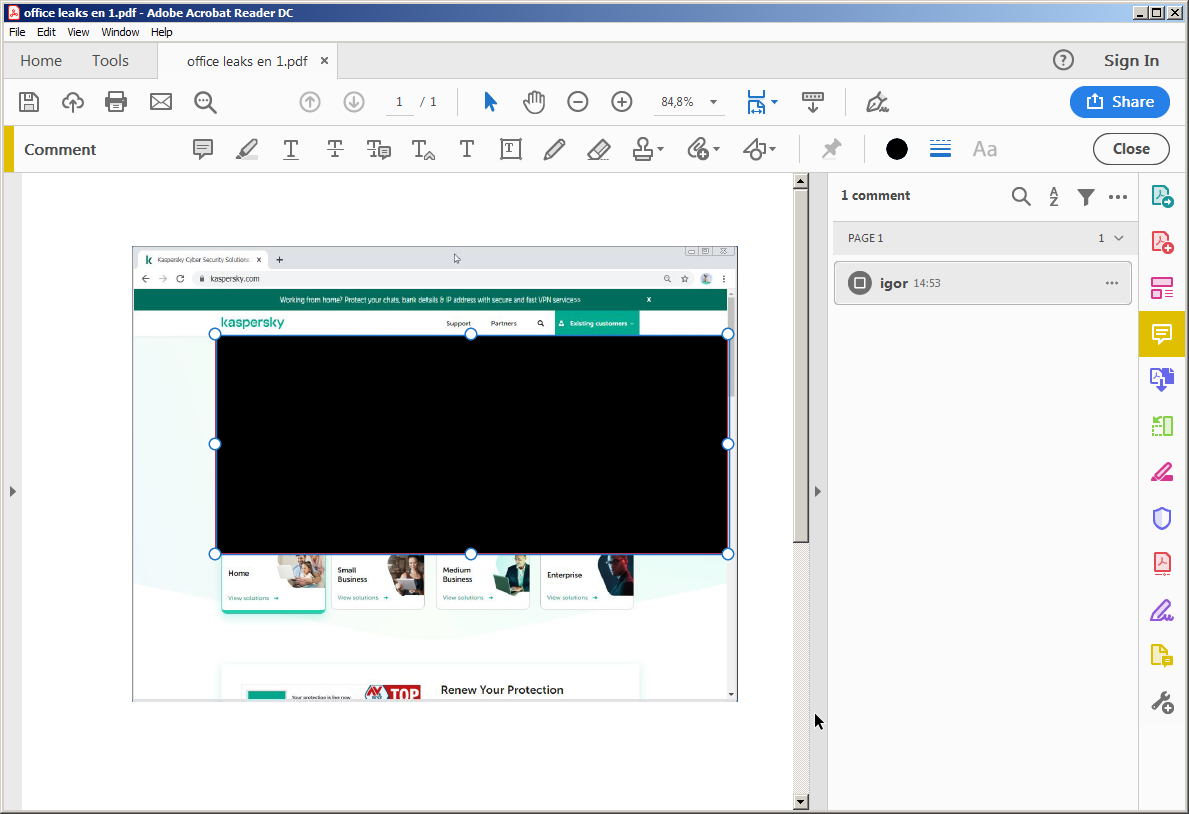
Concealing part of an image in Adobe Acrobat Reader
Alas, if you send that document, the client will still be able to glean too much information about your colleague. Acrobat is not made for image editing, and it has no function to combine a picture with whatever you draw on top of it, so anyone who opens the file can delete or move rectangles and other surface graphics.
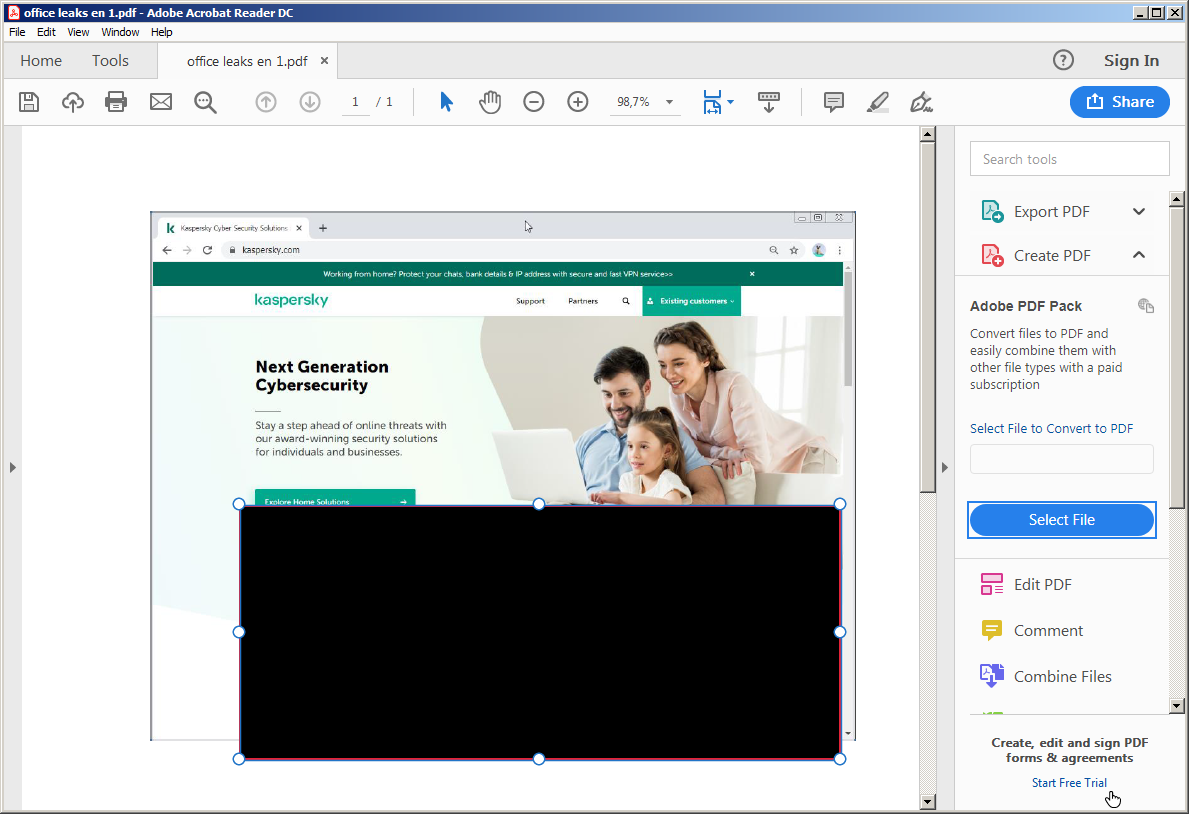
Any user can simply move away a black rectangle drawn in Adobe Acrobat Reader
Exporting from Word to PDF
In some cases, it’s handy to adjust an image in the format in which you created the document (for example, DOCX), and then export it to PDF format. For example, if you crop an image, the trimmed part will not transfer to the PDF. Many people use that simple method for light edits on an image in a document.
However, it’s important to remember that not every image edit works to hide information in that way. For example the black rectangle trick will still fail.
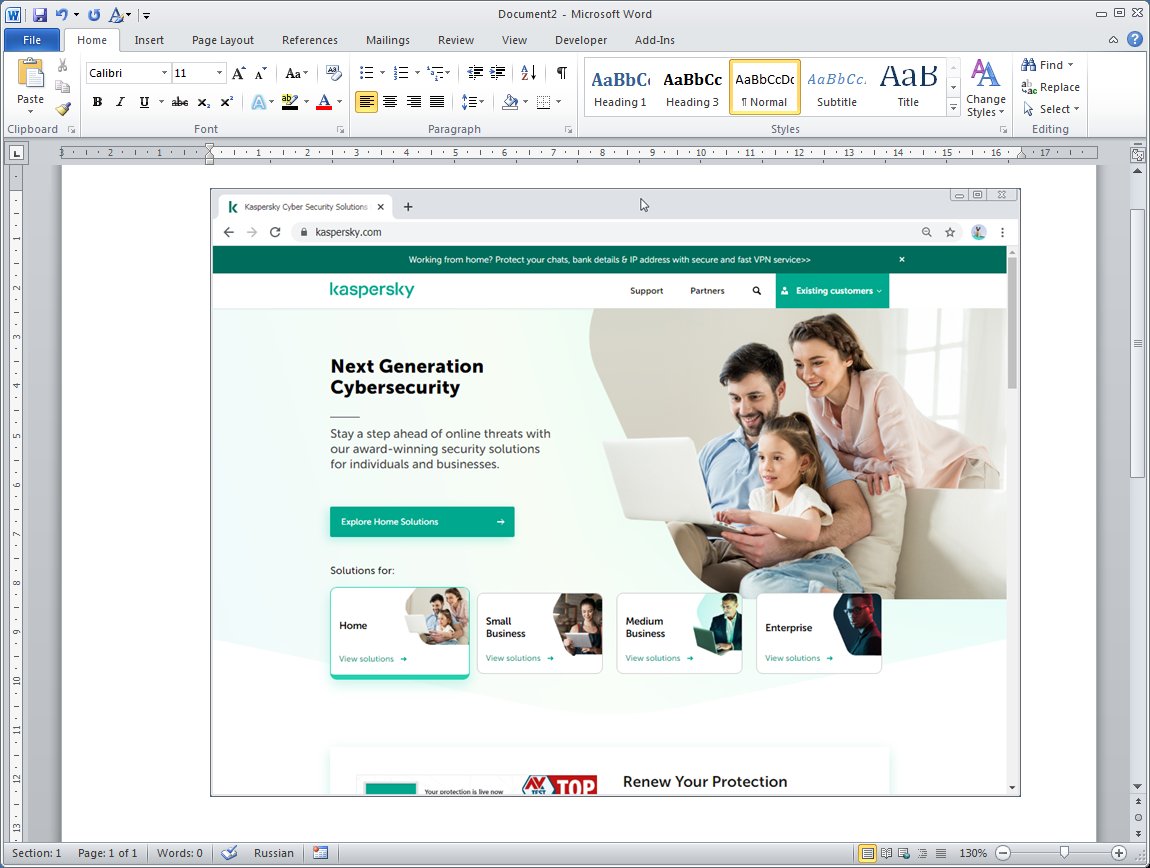
Original image
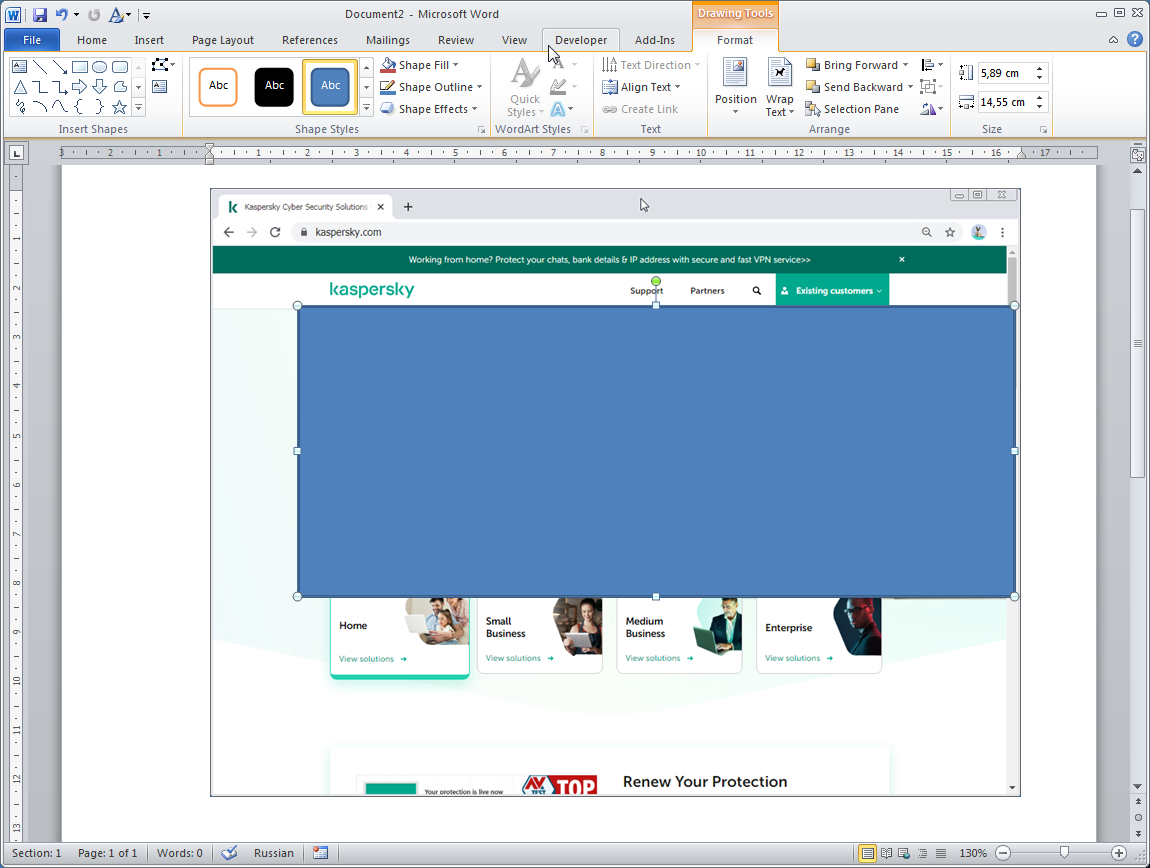
Covering part of an image with a rectangle in Microsoft Word
If, after exporting the MS Word file to PDF, you open the resulting file in Adobe Reader and then copy and paste the image back into Word, you will see the original image with no obscuring rectangle.

Copy an image from a PDF

Paste into Word. Magic!
When you export from Word to PDF, the original image and the object drawn on top are not combined. They’re saved separately. Any concealed bits remain in the file as well.
Ultimately, Microsoft Word is not designed for image editing any more than Acrobat Reader is. If you see a picture that needs altering in a text document, do the editing in a proper graphics editor and then reinsert it in the document.
Microsoft Office Document Inspector
Images are not the only items in a document that can retain private information. Others include headers and footers; tracked revisions, comments, and hidden text; linked files such as Excel spreadsheets that form the basis of charts in a report; sometimes even the name of a document author meant to be anonymous. A single file can be full of such trifles, and it’s easy to forget any or all of them.
To help detect such potential information breaches in good time, Microsoft Office provides the Document Inspector tool. It scans everything mentioned above, including metadata (such as author’s name), headers and footers, hidden text, embedded objects, and so on.
To inspect a file using Document Inspector in Office 365:
- Open the File tab;
- Select Info;
- Click Check for Issues;
- Select Inspect Document.
The names of the settings may differ depending on the version of Word.
If Document Inspector finds sensitive data, it suggests removing it or recommends a safer alternative. For example, if you added a chart from Excel as an interactive object, the tool recommends inserting it as a picture instead — that way the recipient will see it but not be able to examine the original table.
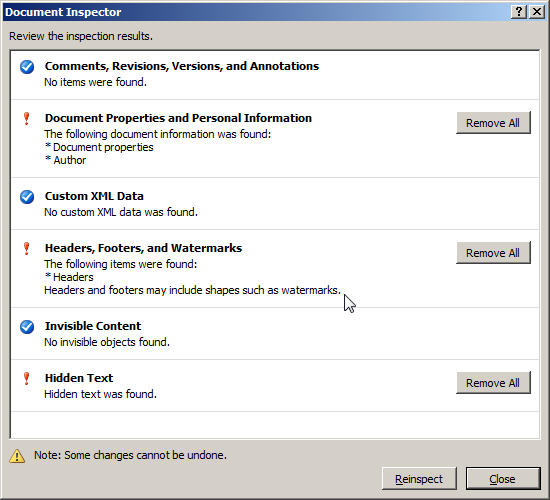
Document Inspector finds confidential data
As for secrets in images, however, Document Inspector is of no use, because it doesn’t even look at them. You will have to recheck those manually, guided by the tips above.
Google Docs remembers everything
Sometimes a document needs editing by a team of colleagues, in which case, PDF is not usually the best format (because of its relative dearth of collaboration tools). Using Word documents locally and sending them around by e-mail is also not a good option; version control is virtually impossible, and the process is too time-consuming, not least because people have to take turns.
Help is at hand in the form of cloud solutions, which allow joint editing of the same copy of a document. However, considering privacy, it’s important to remember that cloud office suites record every action, and the full changelog is accessible to anyone who edits the file.
If you accidentally inserted an object or text with sensitive information into a cloud document, even if you spot the mistake and remove the information immediately, it will remain in the change history for your fellow contributors to see.

The change history contains the deleted image
Even if you deleted all confidential information from the cloud file before making it publicly available, anyone with access to the file can view the change history and roll it back.

Google Docs lets users roll back changes
The problem has a simple solution. If you plan to invite someone to edit an online document with sensitive data in images or other elements you want to hide, create a new file and copy into it only what you want your colleague to see.
Another tip: To avoid pasting anything into a shared document by accident, check what’s in the clipboard first by pasting it into a local file to make sure it’s exactly what you want to share.
How not to leak info in a document
To sum up, here’s how to keep private information in shared documents private — from colleagues and coeditors, not to mention the general public:
- Carefully check document contents before sharing;
- Use dedicated graphics programs to edit images. Use 100% opaque elements to block information and save images in formats that don’t support layering: JPG or PNG;
- Be particularly careful with cloud documents, which keep a record of each file’s entire change history, potentially enabling other people to restore deleted or changed information;
- Do not give coauthors access to cloud documents that ever contained secret data; instead, create a new file and copy across only nonsensitive information;
- Check Word documents with Document Inspector. Download cloud documents in DOCX format and check them as well;
- Be attentive and don’t rush.
